Take Zapier webpage screenshots from many locations

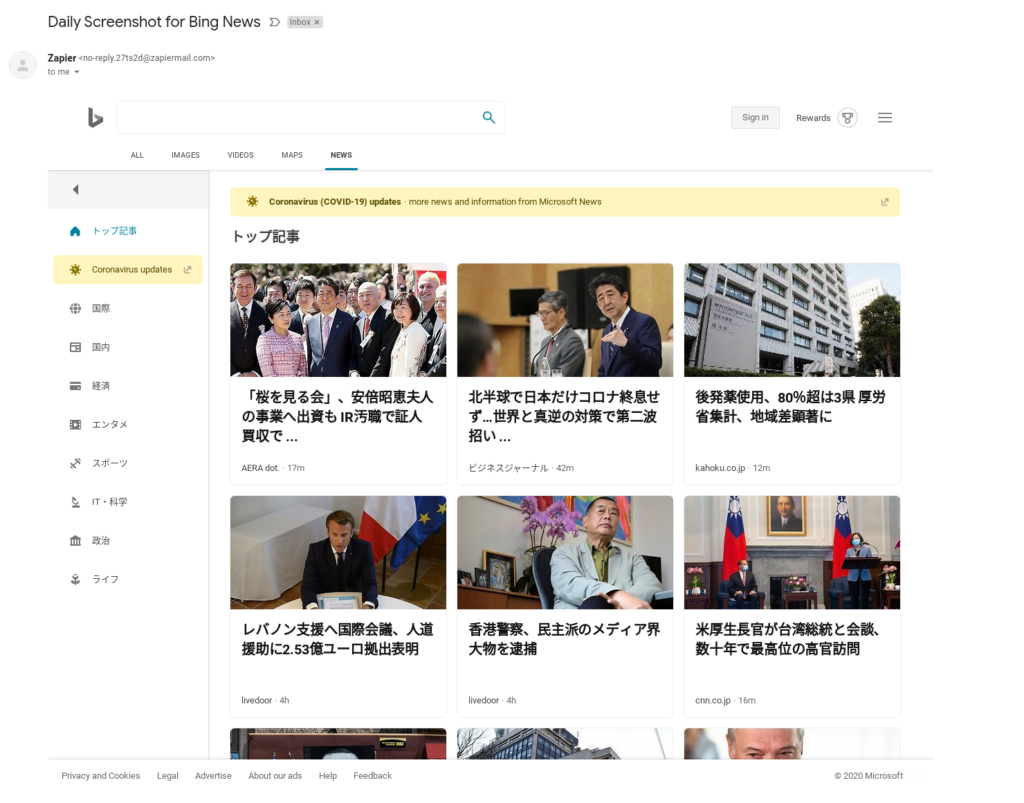
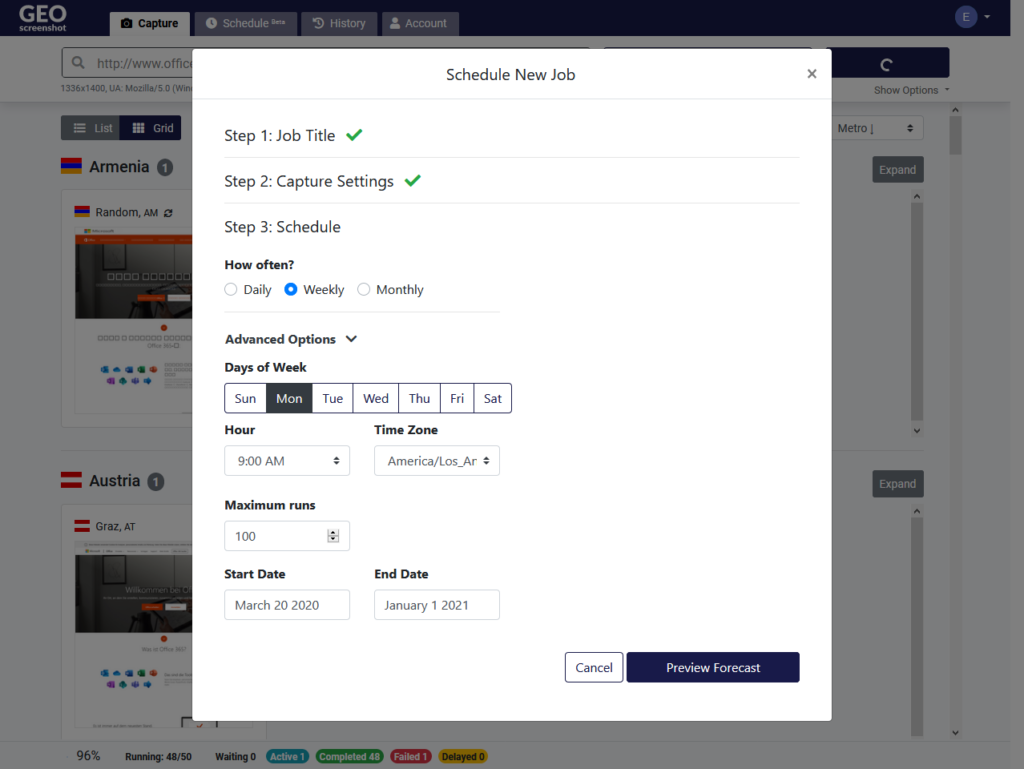
You can now integrate Geo with your tools directly using Zapier. In this tutorial, we’ll create a Zap that captures Bing News daily from Japan and sends an email with a screenshot.

1. Grab an API Key

You can find the API keys in the My Account section
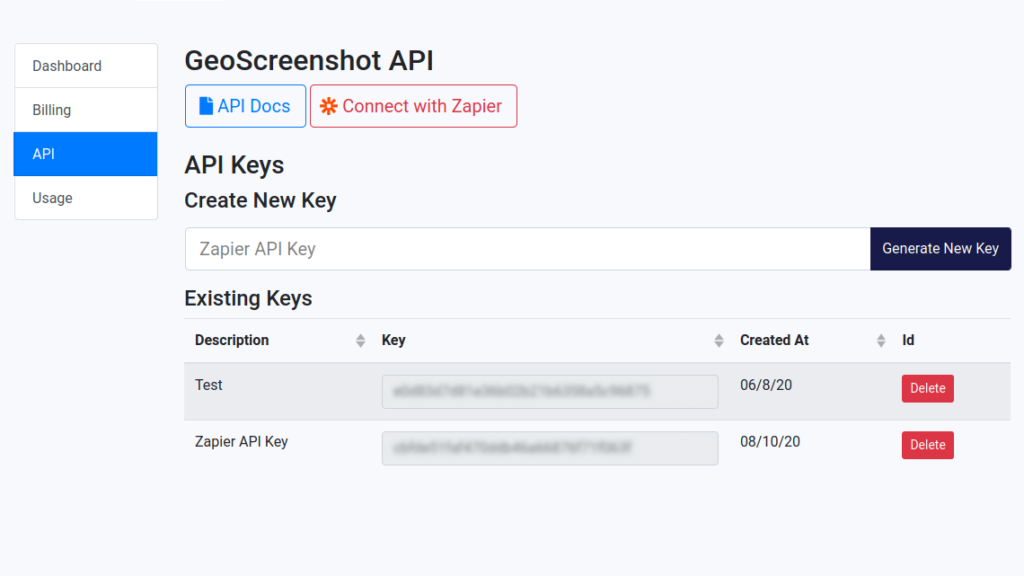
  1. Sign up for the advanced plan, and go to the API section of My Account: https://www.geoscreenshot.com/userarea/account/api
  2. Create a new API key for Zapier. The API key will be shown in the list titled “Existing Keys”. You can hover over the blurred box to reveal the content.
  3. Save the API key in a safe location. You will use this key to authenticate with Zapier.

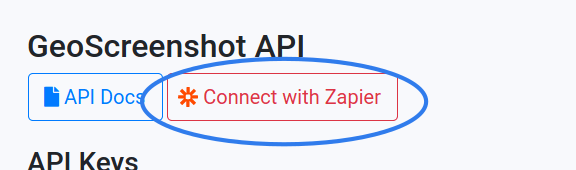
2. Connect with Zapier

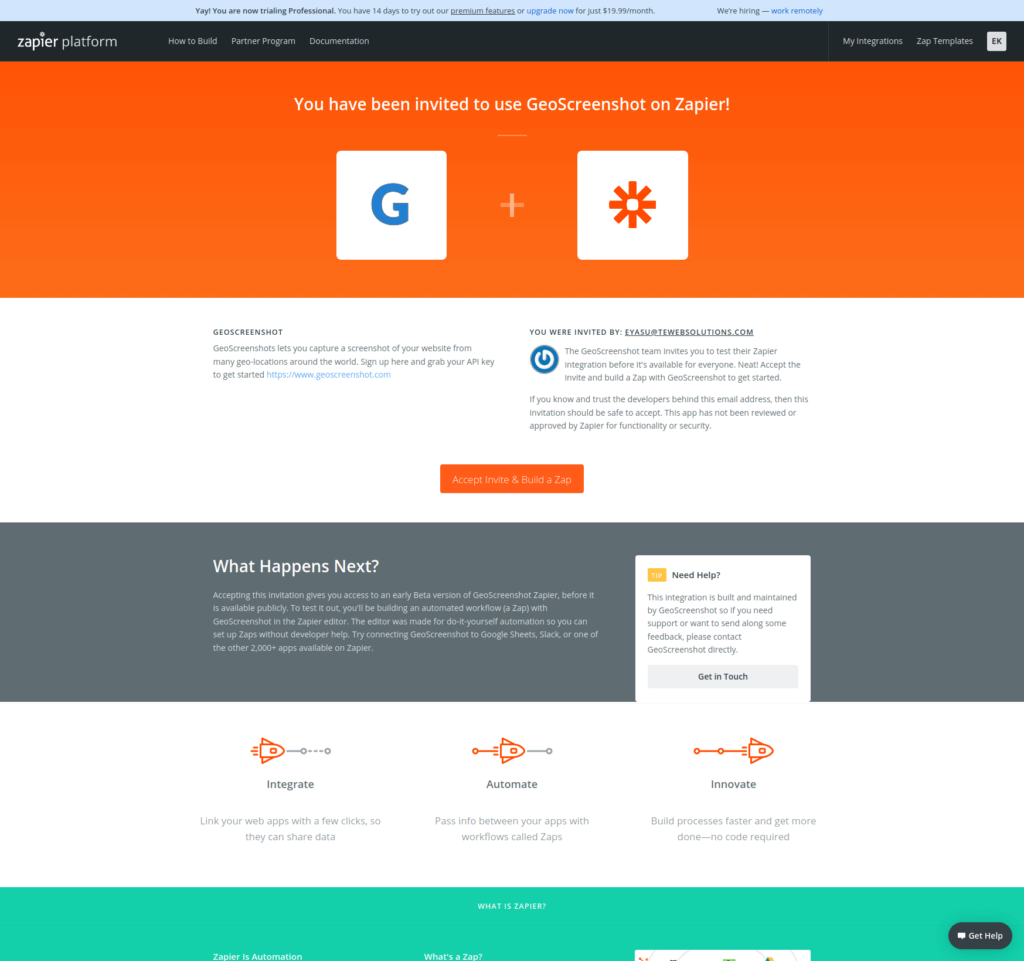
Use the invitation link to sign up for the Zap.

This invite link will take you to the GeoScreenshot integration

Sign up for Zapier or sign in with your existing account. You will see a screen to accept an invitation:

Accept the invitation by clicking “Accept invite and build a zap”

3. Create a new Zap – Authenticate

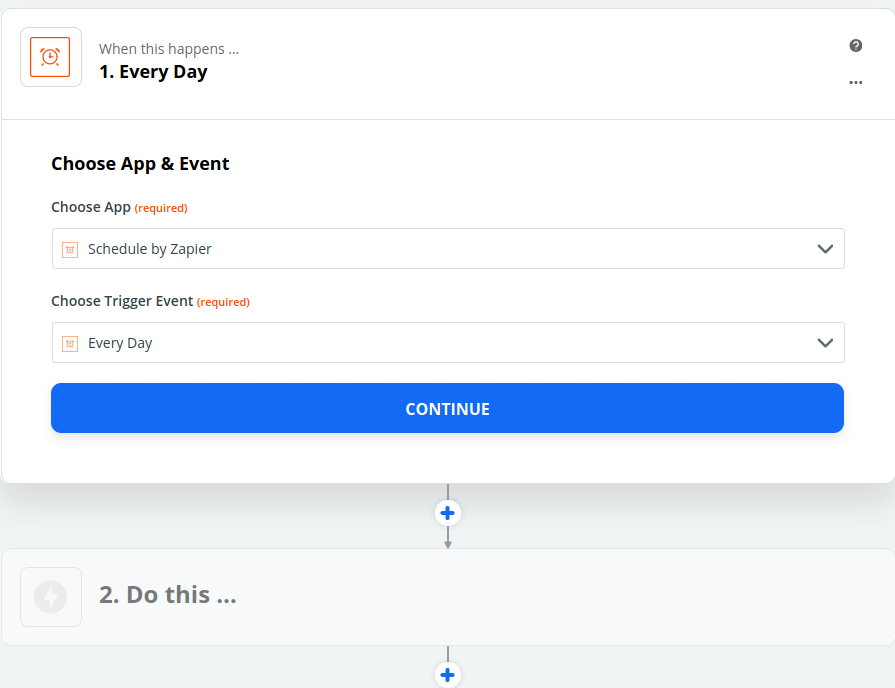
You can use any app that generates events as a trigger for screenshots. For this example, we will use Zapier’s built-in Schedule app.

Configure the triggering event by modifying the settings of the zap

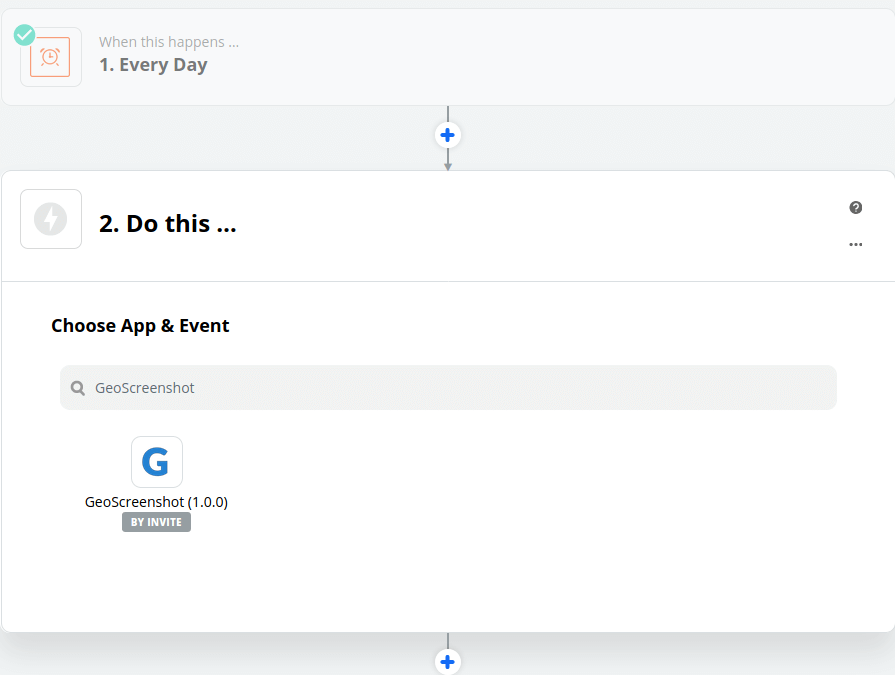
Search for GeoScreenshot and select the app

You should see GeoScreenshot in the search results

Click on Sign in with GeoScreenshot

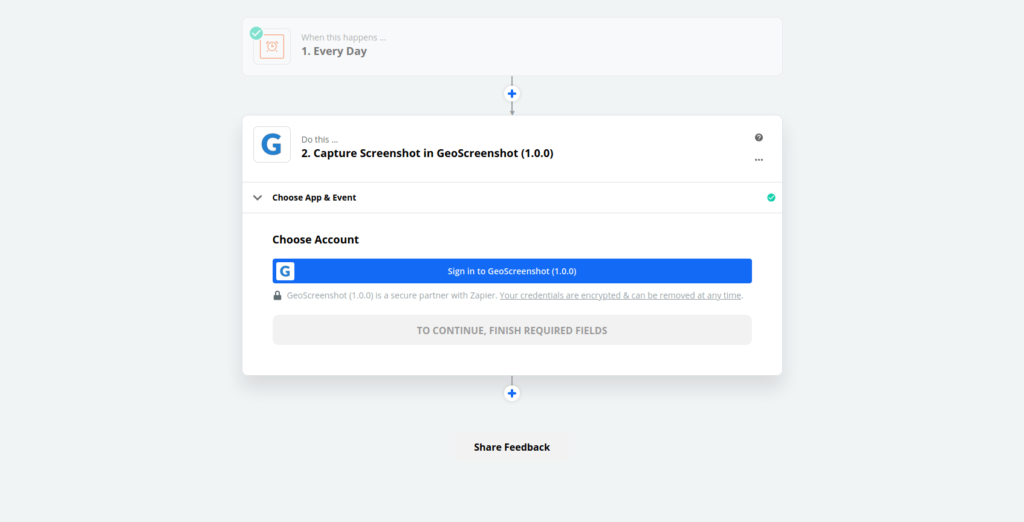
It will open a modal that will ask you for the API Key from Step 1

Fill your API key and click Continue

You should see your email and plan under account

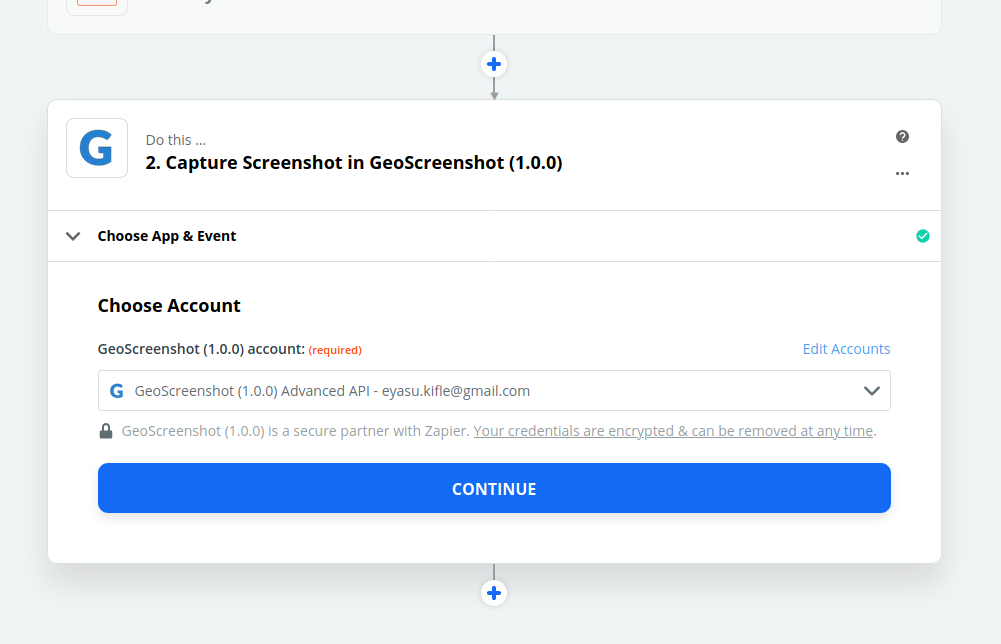
You have now linked Zapier with your Geo account!

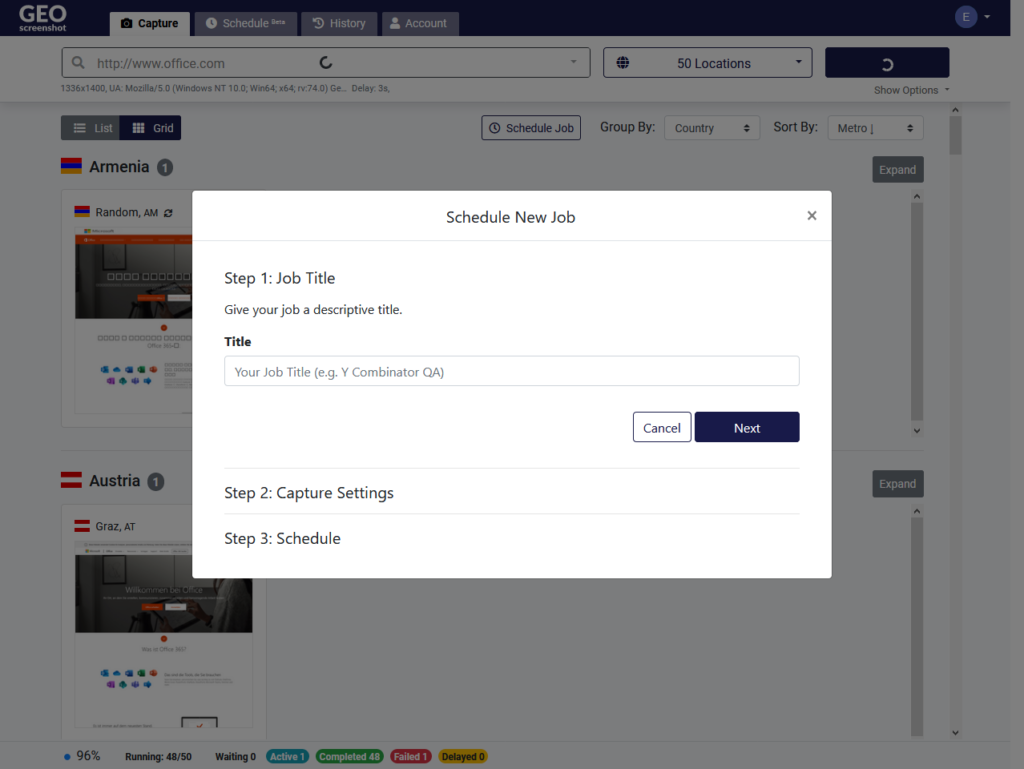
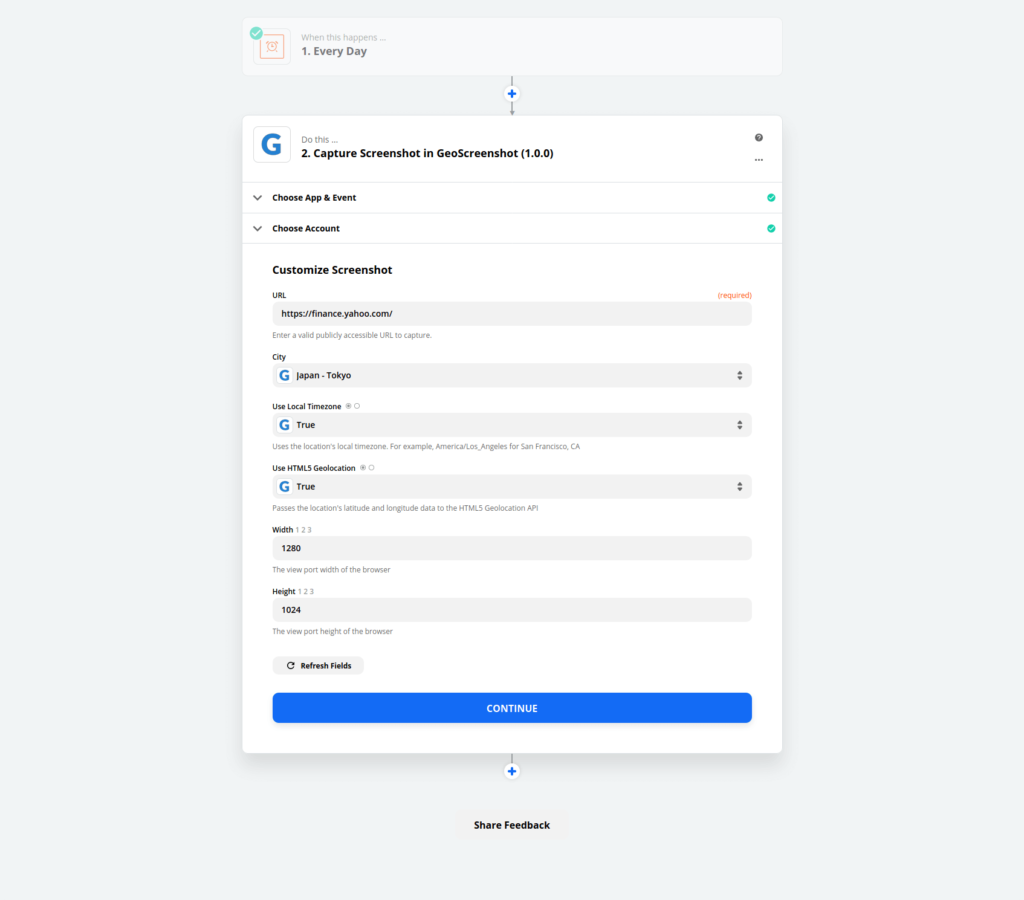
4. Create a new Zap – Screenshot

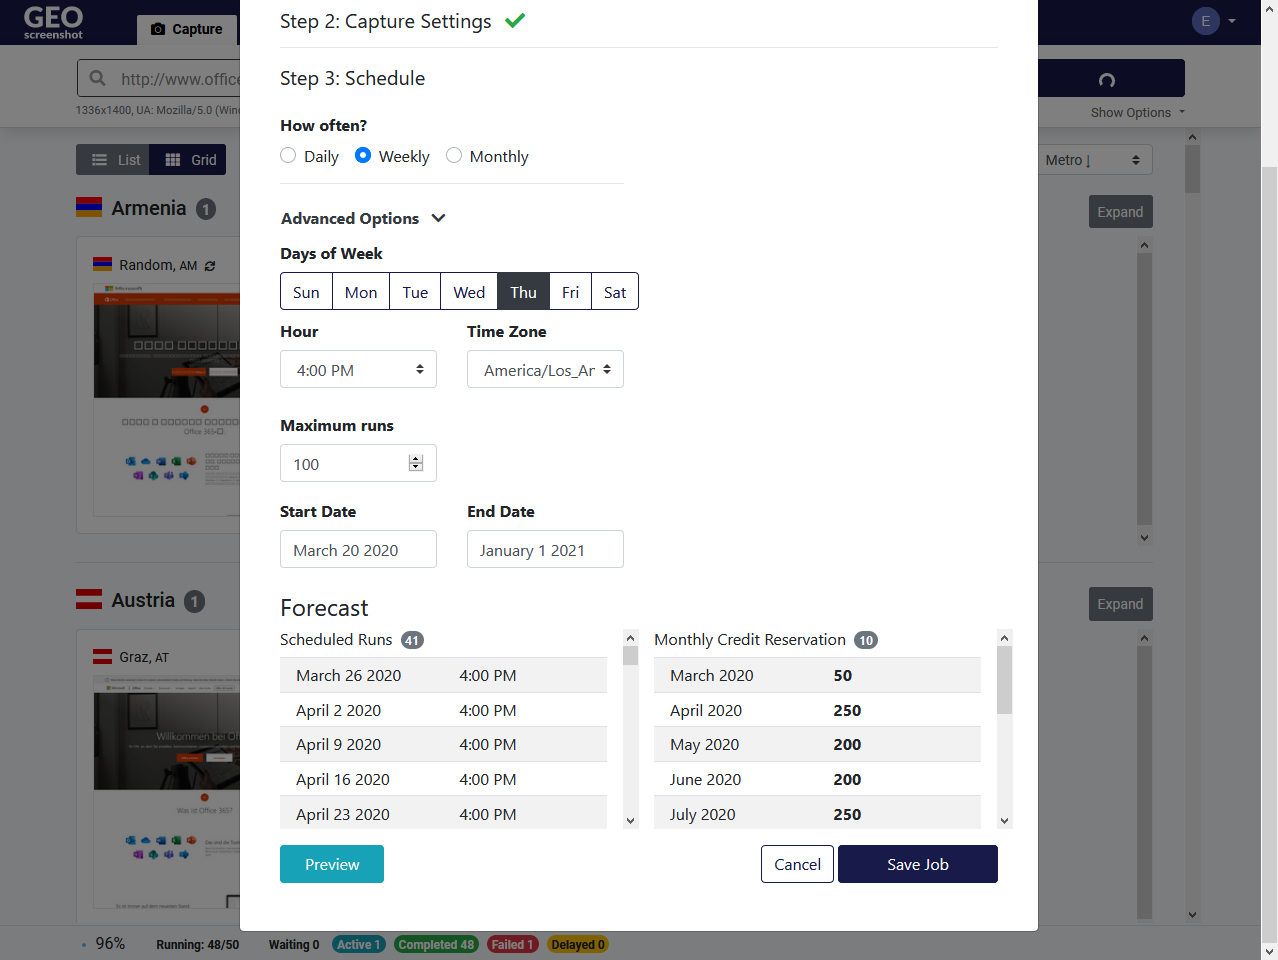
Once you click Continue, it will take you to the capture setting screen.

The options shown here mirror what is available in the Capture user interface at geoscreenshot.com

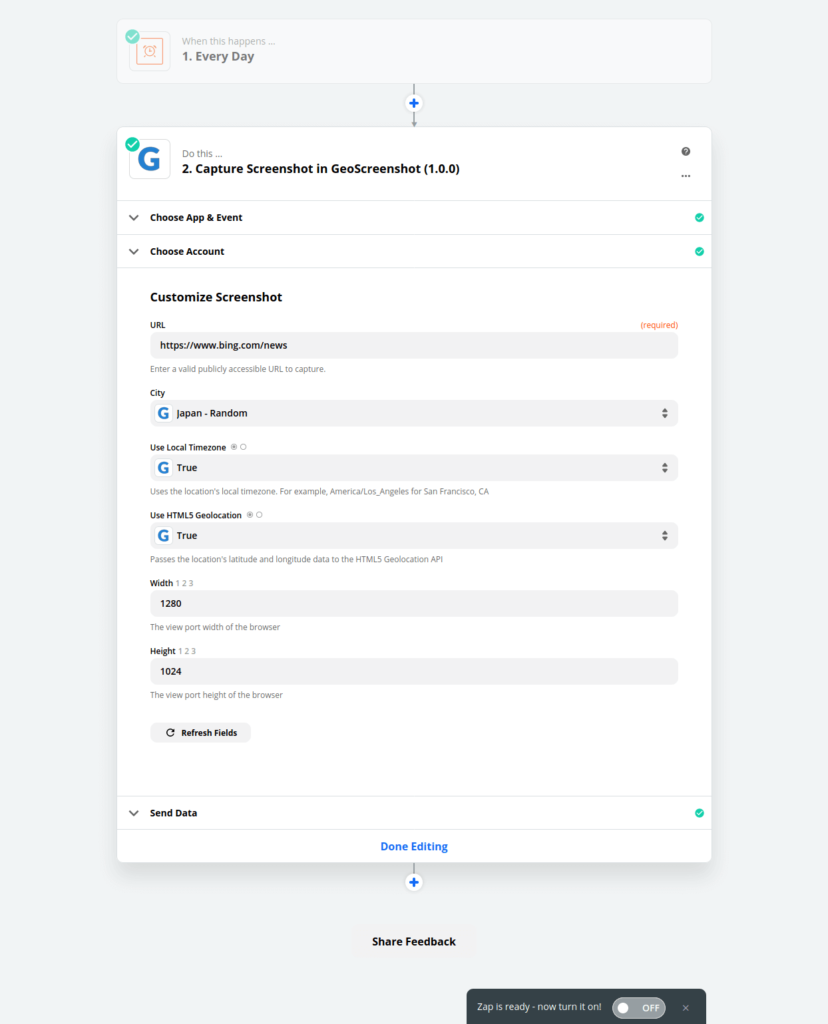
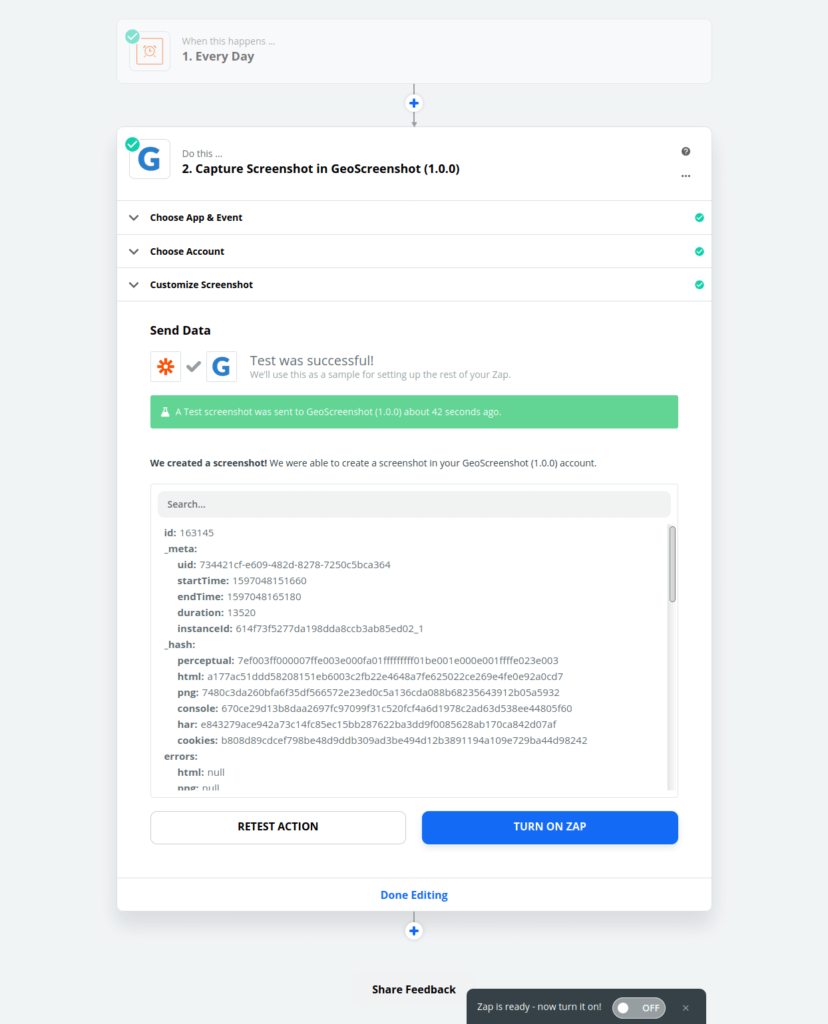
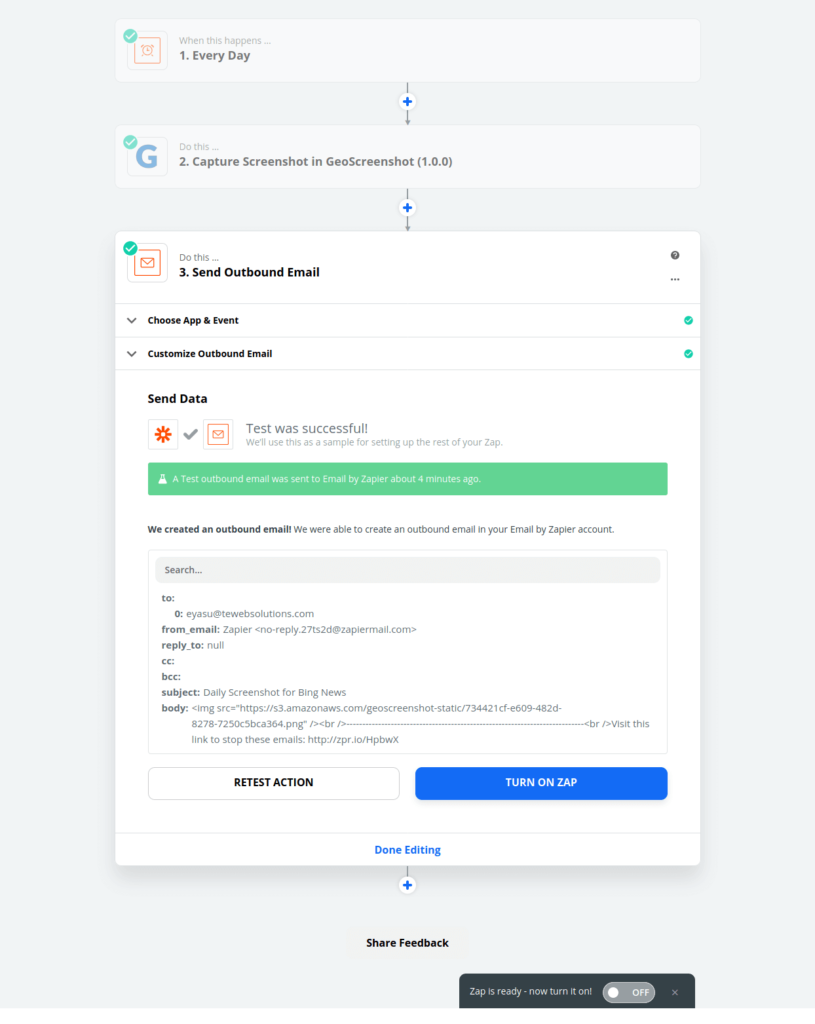
Run a test capture once you’ve configured your capture

You will get a JSON response with all of the output. https://api.geoscreenshot.com/

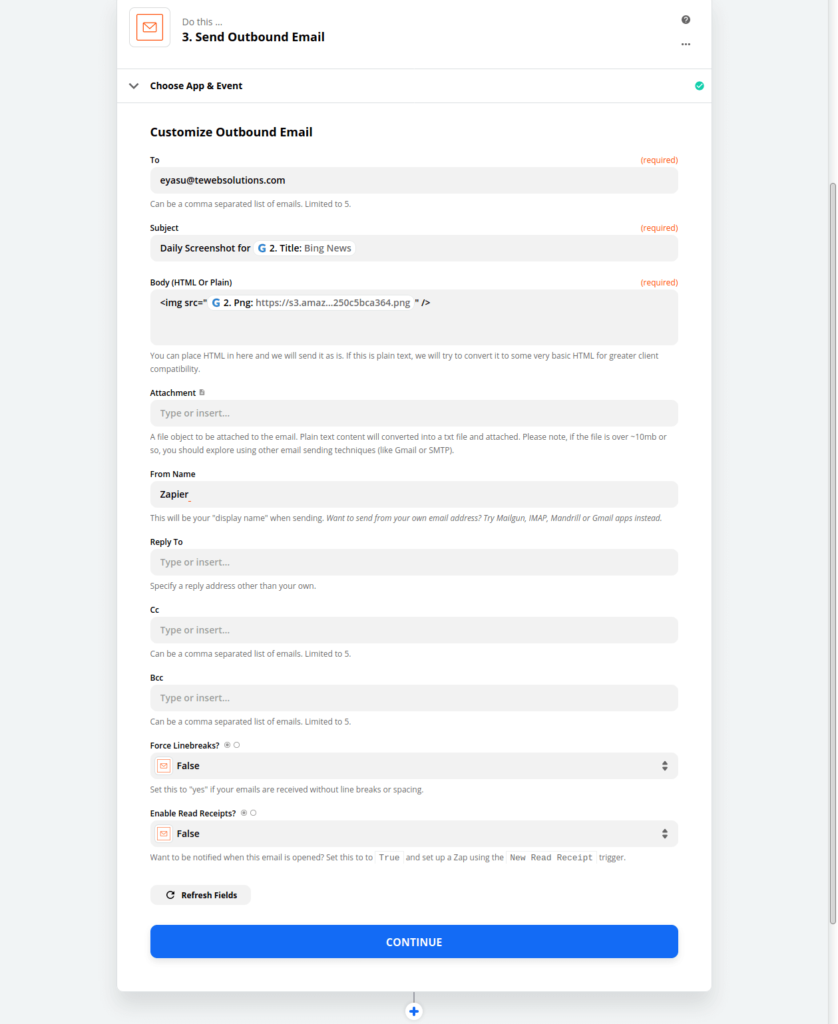
Send an email with the capture results

The Email app by Zapier provides an easy way to send email reports

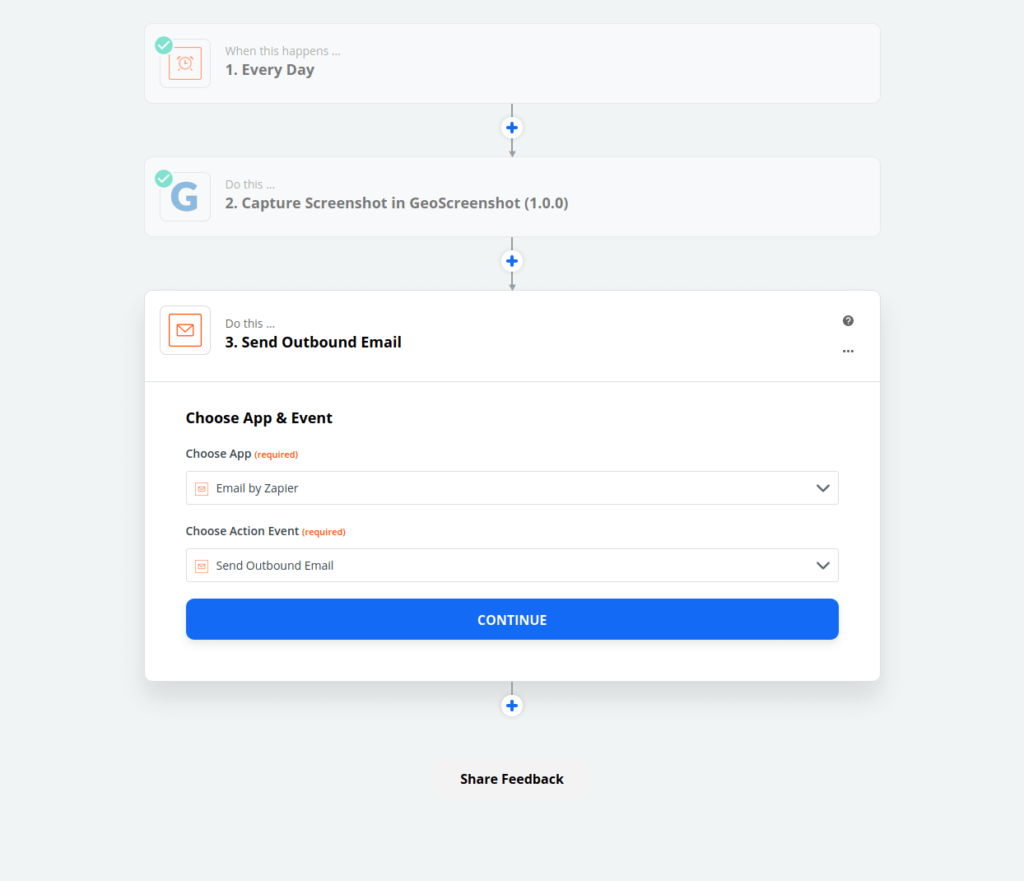
Enrich the body of the email with capture data

You can refer to any field in the JSON response in the body and/or subject of the email
Send a test email and turn on Zap

3. Get a daily email with the screenshot

How to capture your website on a regular interval

We’re proud to announce the release of scheduled captures on GeoScreenshot. You are now able to schedule your captures to run in the background on a daily, weekly or monthly interval and archive your results for future viewing.

Our customers requested this feature to help them track the consistency of their captures over a long period of time. You can also use this feature to maintain an archive of website changes from various locations and configurations.

We’ve released it to all subscribers of our monthly plans. You can schedule as many screenshots as the maximum allows.

To get started,

1. Capture your URL

Go to the capture page and capture your desired URL as you normally would. Feel free to fine tune your capture settings according to your needs.

Capturing www.office.com from 50 locations. The captures are displayed grouped by country.

2. Convert your recent capture to a scheduled job

Once your capture is done, you can click on the Schedule Job button to convert your capture into a job. Give it a descriptive job title, and proceed in the dialog. Your capture settings from your capture (in the example, www.office.com) will be automatically carried to the second step of the flow.

You can click on the schedule button to convert your existing job into a recurrent capture. Your settings for the capture will be automatically persisted.

3. Customize your capture schedule

On step 3, you can choose to run your capture daily, weekly or monthly. You can further customize the schedule by customizing it further by setting the day of week, hour, time zone and limiting the maximum number of runs. In addition, you can choose to limit all jobs to a time window.

You can expand the Advanced Options section to fine tune the capture schedule to meet your needs.

4. Confirm your final schedule

As a final check, you can preview a forecast of the run times and get an estimate for monthly credit reservations. When your job is active, it will reserve the necessary number of credits from your prepaid and subscription pool. Once you deactivate your job, any unused credits will be refunded to your subscription credits.

Click Save Job when you are done.

You can make changes to your schedule and click Preview to see how it will affect the actual dates and monthly credit costs

5. You are set!

Once you have configured your jobs, you can click on the schedule tab to see a dashboard of your upcoming runs.

You will get a comprehensive report of your latest runs from all your scheduled jobs on this screen.

6. Give us feedback

Email [email protected] with any questions or feedback. We’d love to hear your suggestions for improvement.